Scrape website in parallel with multiple Actor runs
Learn how to run multiple instances of an Actor to scrape a website faster. This tutorial will guide you through the process of setting up your scraper.
Imagine a large website that you need to scrape. You have a scraper that works well, but scraping the whole website is slow. You can speed up the scraping process by running multiple instances of the scraper in parallel. This tutorial will guide you through setting up your scraper to run multiple instances in parallel.
You can check full code example right away.
Managing Multiple Scraper Runs
To manage multiple instances of the scraper, we need to build an Orchestrator Actor to oversee the process. This Orchestrator Actor will initiate several scraper runs and manage their operations. It will set up a request queue and a dataset that the other Actor runs will utilize to crawl the website and store results. In this tutorial, we set up the Orchestrator Actor and the scraper Actor.
Orchestrator Actor Configuration
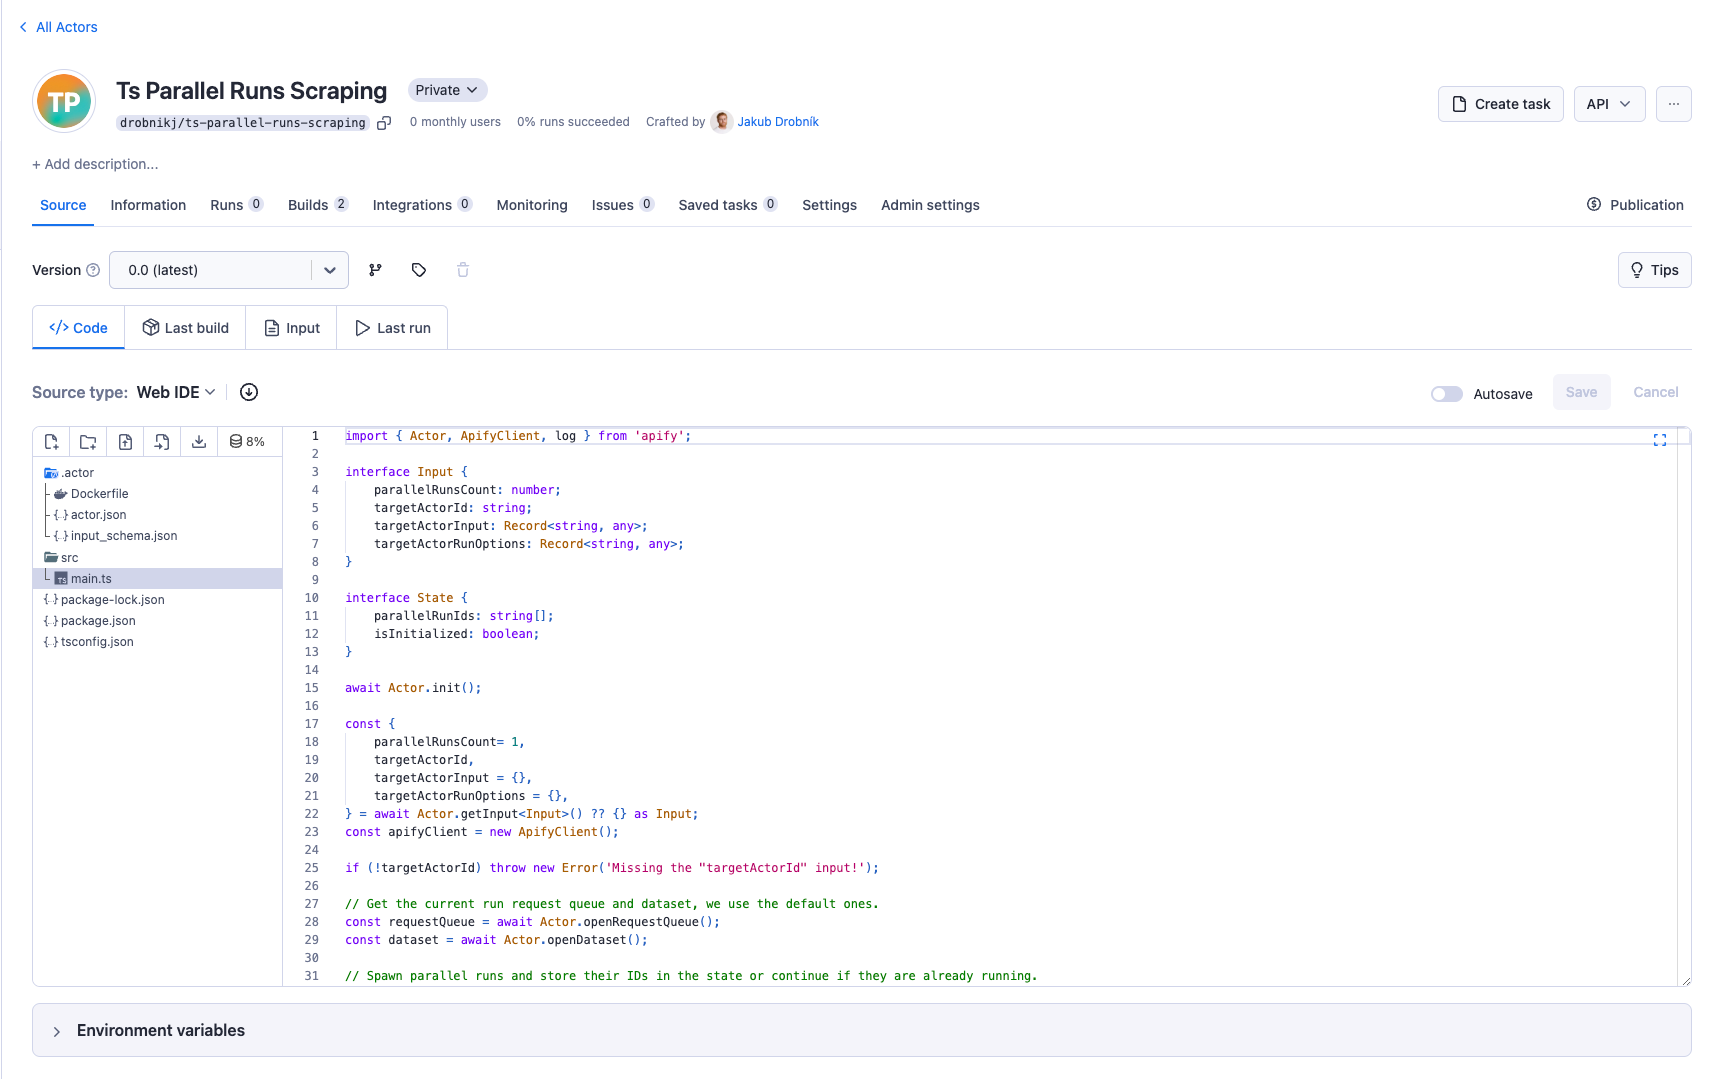
The Orchestrator Actor orchestrates the parallel execution of scraper Actor runs. It runs multiple instances of the scraper Actor and passes the request queue and dataset to them. For the Actor's base structure, we use Apify CLI and create a new Actor with the following command and use the Empty TypeScript Actor template.
apify create orchestrator-actor
If you don't have Apify CLI installed, check out our installation instructions.
Input Configuration
Let's start by defining the Input Schema for the Orchestrator Actor. The input for the Actor will specify configurations needed to initiate and manage multiple scraper Actors in parallel. Here’s the breakdown of the necessary input:
- input_schema.json
- main.ts
{
    "title": "Orchestrator Actor Input",
    "type": "object",
    "schemaVersion": 1,
    "properties": {
        "parallelRunsCount": {
            "title": "Parallel Actor runs count",
            "type": "integer",
            "description": "Number of parallel runs of the Actor.",
            "default": 1
        },
        "targetActorId": {
            "title": "Actor ID",
            "type": "string",
            "editor": "textfield",
            "description": "ID of the Actor to run."
        },
        "targetActorInput": {
            "title": "Actor Input",
            "type": "object",
            "description": "Input of the Actor to run",
            "editor": "json",
            "prefill": {}
        },
        "targetActorRunOptions": {
            "title": "Actor Run Options",
            "type": "object",
            "description": "Options for the Actor run",
            "editor": "json",
            "prefill": {}
        }
    },
    "required": ["parallelRunsCount", "targetActorId"]
}
import { Actor, log } from 'apify';

interface Input {
    parallelRunsCount: number;
    targetActorId: string;
    targetActorInput: Record<string, any>;
    targetActorRunOptions: Record<string, any>;
}

await Actor.init();

const {
    parallelRunsCount= 1,
    targetActorId,
    targetActorInput = {},
    targetActorRunOptions = {},
} = await Actor.getInput<Input>() ?? {} as Input;
const { apifyClient } = Actor;

if (!targetActorId) throw new Error('Missing the "targetActorId" input!');
Reusing dataset and request queue
The Orchestrator Actor will reuse its default dataset and request queue. The dataset stores the results of the scraping process, and the request queue is used as shared storage for processing requests.
import { Actor } from 'apify';

const requestQueue = await Actor.openRequestQueue();
const dataset = await Actor.openDataset();
State
The Orchestrator Actor will maintain the state of the scraping runs to track progress and manage continuity. It will record the state of Actor runs, initializing this tracking with the first run. This persistent state ensures that, in migration or restart (resurrection) cases, the Actor can resume the same runs without losing progress.
import { Actor, log } from 'apify';

const { apifyClient } = Actor;
const state = await Actor.useState<State>('actor-state', { parallelRunIds: [], isInitialized: false });

if (state.isInitialized) {
    for (const runId of state.parallelRunIds) {
        const runClient = apifyClient.run(runId);
        const run = await runClient.get();

        // This should happen if the run was deleted or the state was incorectly saved.
        if (!run) throw new Error(`The run ${runId} from state does not exists.`);

        if (run.status === 'RUNNING') {
            log.info('Parallel run is already running.', { runId });
        } else {
            log.info(`Parallel run was in state ${run.status}, resurrecting.`, { runId });
            await runClient.resurrect(targetActorRunOptions);
        }
    }
} else {
    for (let i = 0; i < parallelRunsCount; i++) {
        const run = await Actor.start(targetActorId, {
            ...targetActorInput,
            datasetId: dataset.id,
            requestQueueId: requestQueue.id,
        }, targetActorRunOptions);
        log.info(`Started parallel run with ID: ${run.id}`, { runId: run.id });
        state.parallelRunIds.push(run.id);
    }
    state.isInitialized = true;
}
Once Actor is initialized, it launches parallel scraper runs and waits for them to complete using Promise.all().
Additionally, by registering for abort events, the Actor can terminate all parallel runs if the Coordinator Actor is stopped.
- input_schema.json
- main.ts
{
    "title": "Orchestrator Actor Input",
    "type": "object",
    "schemaVersion": 1,
    "properties": {
        "parallelRunsCount": {
            "title": "Parallel Actor runs count",
            "type": "integer",
            "description": "Number of parallel runs of the Actor.",
            "default": 1
        },
        "targetActorId": {
            "title": "Actor ID",
            "type": "string",
            "editor": "textfield",
            "description": "ID of the Actor to run."
        },
        "targetActorInput": {
            "title": "Actor Input",
            "type": "object",
            "description": "Input of the Actor to run",
            "editor": "json",
            "prefill": {}
        },
        "targetActorRunOptions": {
            "title": "Actor Run Options",
            "type": "object",
            "description": "Options for the Actor run",
            "editor": "json",
            "prefill": {}
        }
    },
    "required": ["parallelRunsCount", "targetActorId"]
}
import { Actor, log } from 'apify';

interface Input {
    parallelRunsCount: number;
    targetActorId: string;
    targetActorInput: Record<string, any>;
    targetActorRunOptions: Record<string, any>;
}

interface State {
    parallelRunIds: string[];
    isInitialized: boolean;
}

await Actor.init();

const {
    parallelRunsCount= 1,
    targetActorId,
    targetActorInput = {},
    targetActorRunOptions = {},
} = await Actor.getInput<Input>() ?? {} as Input;
const { apifyClient} = Actor;

if (!targetActorId) throw await Actor.fail('Missing the "targetActorId" input!');

// Get the current run request queue and dataset, we use the default ones.
const requestQueue = await Actor.openRequestQueue();
const dataset = await Actor.openDataset();

// Spawn parallel runs and store their IDs in the state or continue if they are already running.
const state = await Actor.useState<State>('actor-state', { parallelRunIds: [], isInitialized: false });

if (state.isInitialized) {
    for (const runId of state.parallelRunIds) {
        const runClient = apifyClient.run(runId);
        const run = await runClient.get();

        // This should happen only if the run was deleted or the state was incorectly saved.
        if (!run) throw await Actor.fail(`The run ${runId} from state does not exists.`);

        if (run.status === 'RUNNING') {
            log.info('Parallel run is already running.', { runId });
        } else {
            log.info(`Parallel run was in state ${run.status}, resurrecting.`, { runId });
            await runClient.resurrect(targetActorRunOptions);
        }
    }
} else {
    for (let i = 0; i < parallelRunsCount; i++) {
        const run = await Actor.start(targetActorId, {
            ...targetActorInput,
            datasetId: dataset.id,
            requestQueueId: requestQueue.id,
        }, targetActorRunOptions);
        log.info(`Started parallel run with ID: ${run.id}`, { runId: run.id });
        state.parallelRunIds.push(run.id);
    }
    state.isInitialized = true;
}

const parallelRunPromises = state.parallelRunIds.map((runId) => {
    const runClient = apifyClient.run(runId);
    return runClient.waitForFinish();
});

// Abort parallel runs if the main run is aborted
Actor.on('aborting', async () => {
    for (const runId of state.parallelRunIds) {
        log.info('Aborting run', { runId });
        await apifyClient.run(runId).abort();
    }
});

// Wait for all parallel runs to finish
await Promise.all(parallelRunPromises);

// Gracefully exit the Actor process. It's recommended to quit all Actors with an exit()
await Actor.exit();
Pushing to Apify
Once you have the Orchestrator Actor ready, you can push it to Apify using the following command from the root directory of the Actor project:
apify push
If you are pushing the Actor for the first time, you will need to login to your Apify account.
By running this command, you will be prompted to provide the Actor ID, which you can find in the Apify Console under the Actors tab.
Scraper Actor Configuration
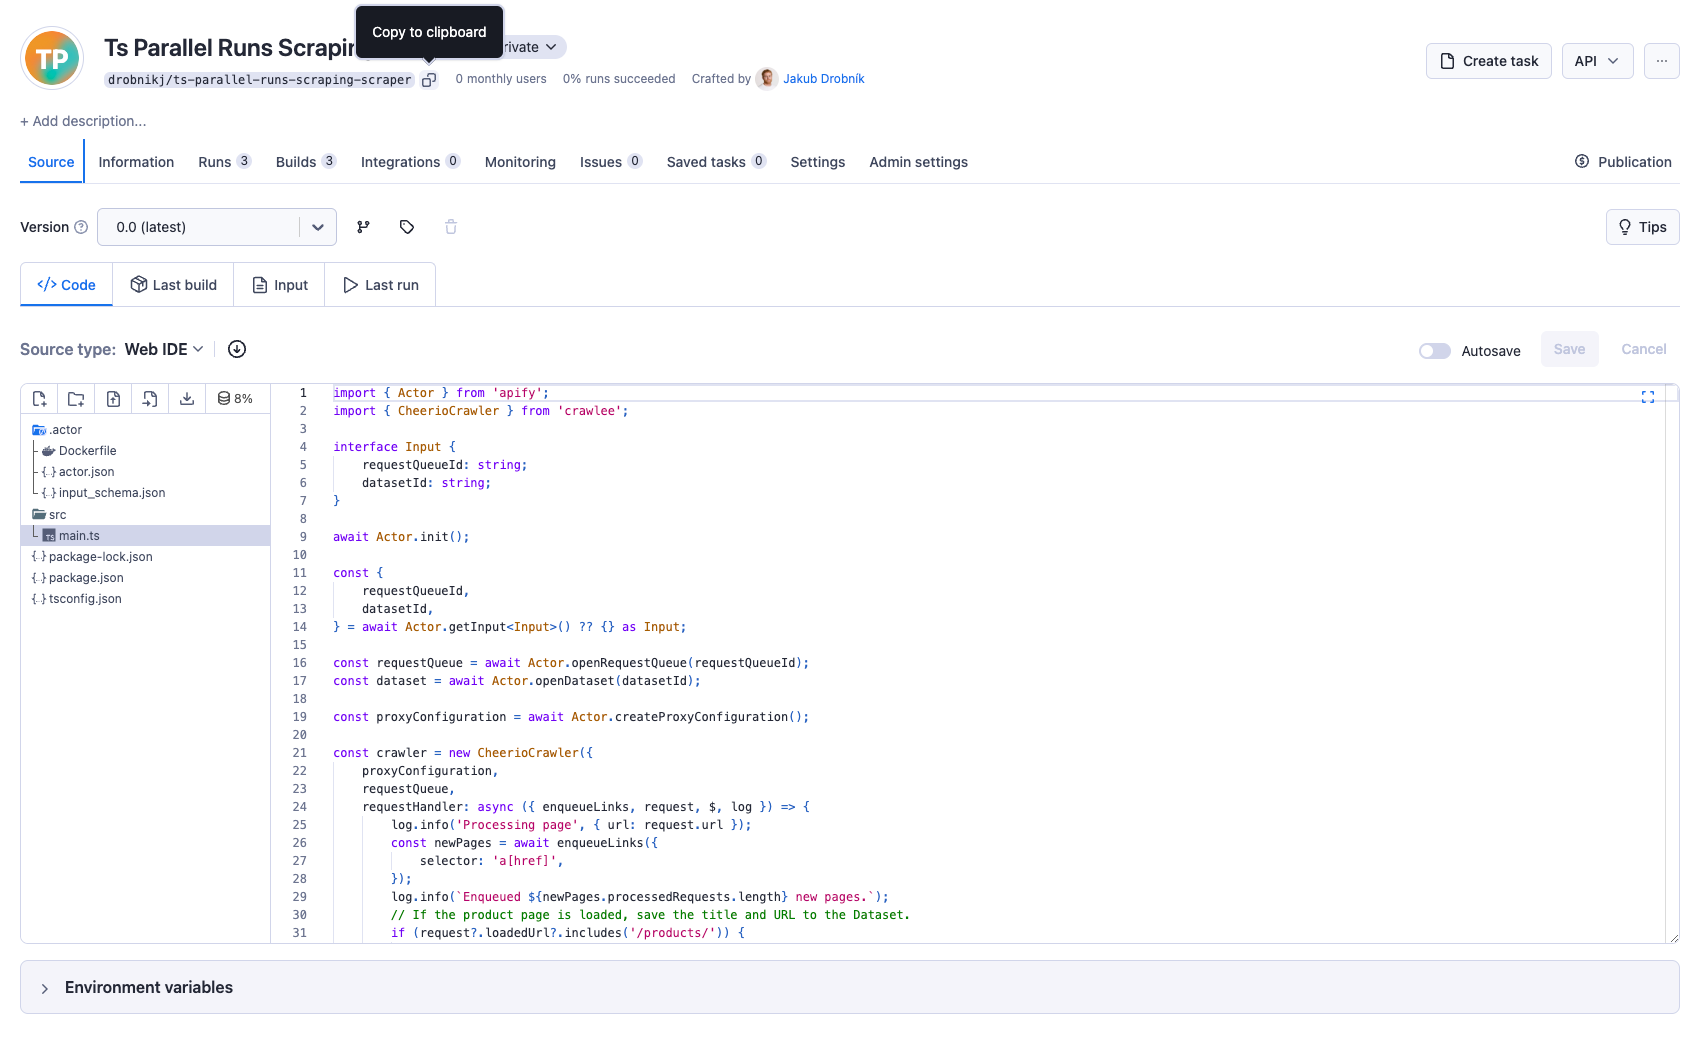
The Scraper Actor performs website scraping. It operates using the request queue and dataset provided by the Orchestrator Actor. You will need to integrate your chosen scraper logic into this framework. The only thing you need to do is utilize the request queue and dataset initialized by the Orchestrator Actor.
import { Actor } from 'apify';

interface Input {
    requestQueueId: string;
    datasetId: string;
}

const {
    requestQueueId,
    datasetId,
} = await Actor.getInput<Input>() ?? {} as Input;

const requestQueue = await Actor.openRequestQueue(requestQueueId);
const dataset = await Actor.openDataset(datasetId);
Once you initialized the request queue and dataset, you can start scraping the website. In this example, we will use the CheerioCrawler to scrape the example of ecommerce website. You can create your scraper from the Crawlee + Cheerio TypeScript Actor template.
- input_schema.json
- main.ts
{
    "title": "Scraper Actor Input",
    "type": "object",
    "schemaVersion": 1,
    "properties": {
        "requestQueueId": {
            "title": "Request Queue ID",
            "type": "string",
            "editor": "textfield",
            "description": "Request queue to use in scraper."
        },
        "datasetId": {
            "title": "Dataset ID",
            "type": "string",
            "editor": "textfield",
            "description": "Dataset to use in scraper."
        }
    },
    "required": ["requestQueueId", "datasetId"]
}
import { Actor } from 'apify';
import { CheerioCrawler } from 'crawlee';

interface Input {
    requestQueueId: string;
    datasetId: string;
}

await Actor.init();

const {
    requestQueueId,
    datasetId,
} = await Actor.getInput<Input>() ?? {} as Input;

const requestQueue = await Actor.openRequestQueue(requestQueueId);
const dataset = await Actor.openDataset(datasetId);

const proxyConfiguration = await Actor.createProxyConfiguration();

const crawler = new CheerioCrawler({
    proxyConfiguration,
    requestQueue,
    requestHandler: async ({ enqueueLinks, request, $, log }) => {
        log.info('Processing page', { url: request.url });
        const newPages = await enqueueLinks({
            selector: 'a[href]',
        });
        log.info(`Enqueued ${newPages.processedRequests.length} new pages.`);
        // If the product page is loaded, save the title and URL to the Dataset.
        if (request?.loadedUrl?.includes('/products/')) {
            const title = $('title').text();
            await dataset.pushData({ url: request.loadedUrl, title });
        }
    },
});

await crawler.run(['https://warehouse-theme-metal.myshopify.com/']);

// Gracefully exit the Actor process. It's recommended to quit all Actors with an exit()
await Actor.exit();
You can check full code example.
You need to push the Scraper Actor to Apify using the following command from the root directory of the Actor project:
apify push
After pushing the Scraper Actor to Apify, you must get the Actor ID from the Apify Console.
Run orchestration in Apify Console
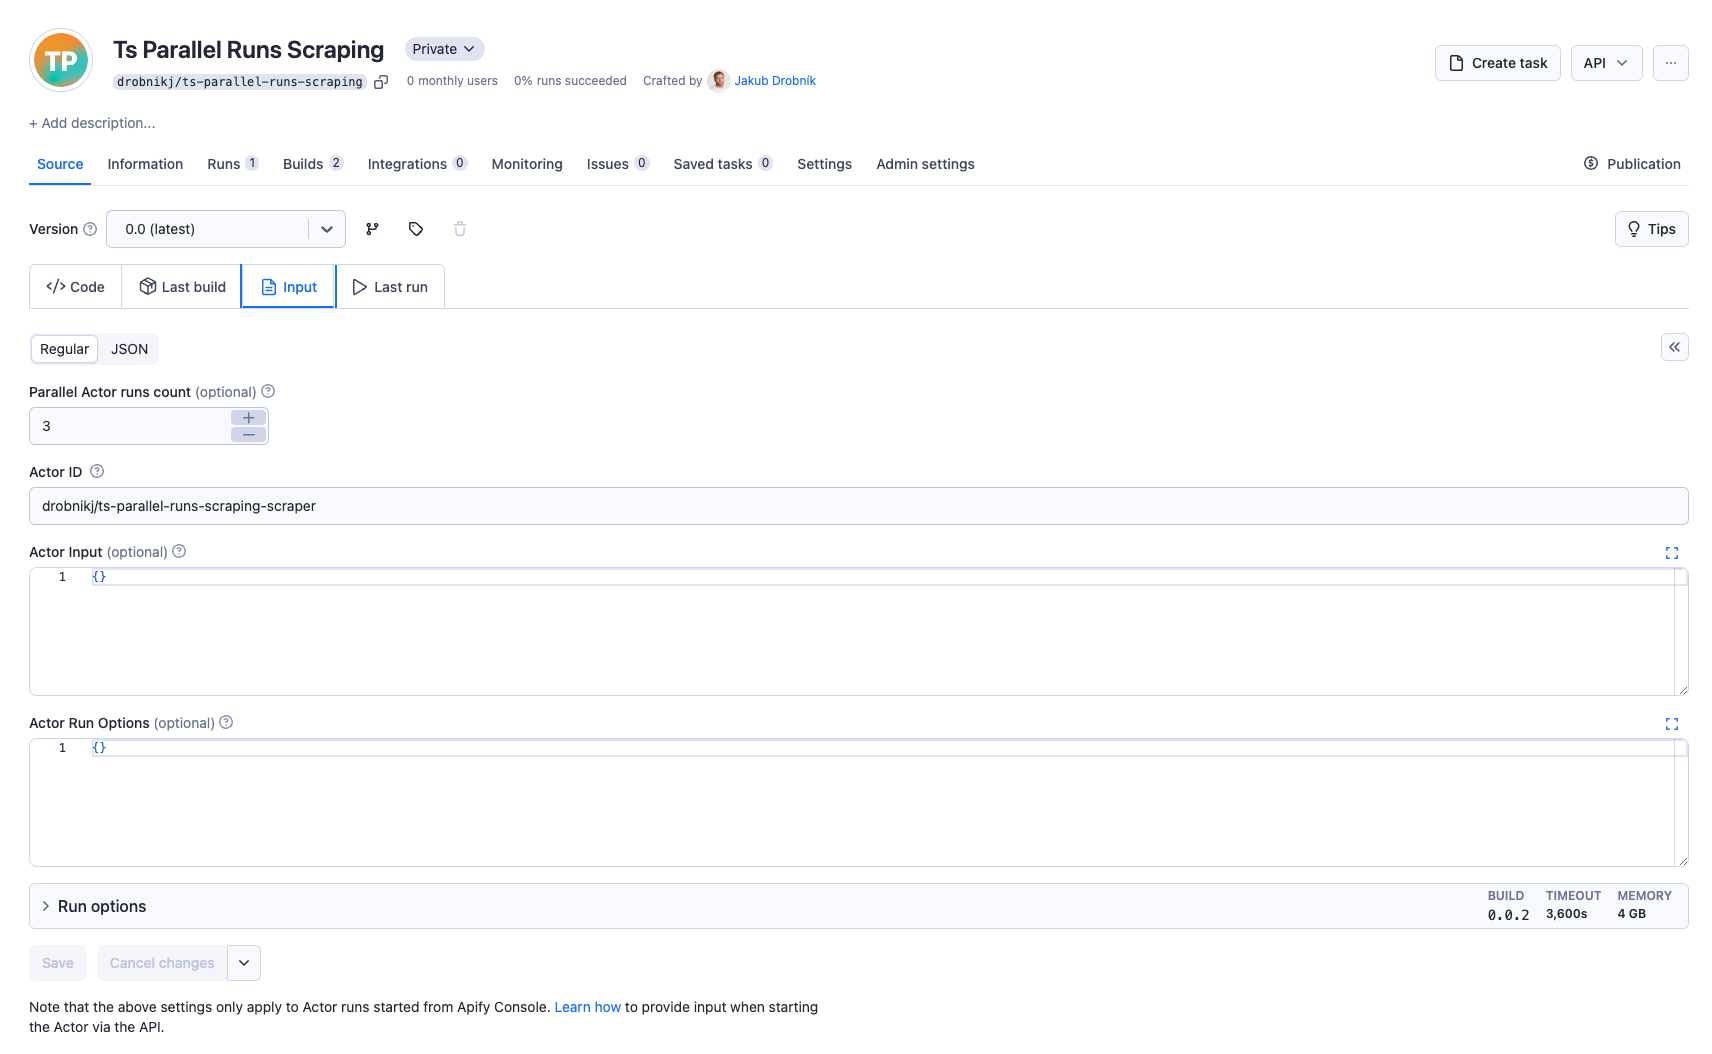
Once you have the Orchestrator Actor and Scraper Actor pushed to Apify, you can run the Orchestrator Actor in the Apify Console. You can set the input for the Orchestrator Actor to specify the number of parallel runs and the target Actor ID, input, and run options. After you hit the Start button, the Orchestrator Actor will start the parallel runs of the Scraper Actor.
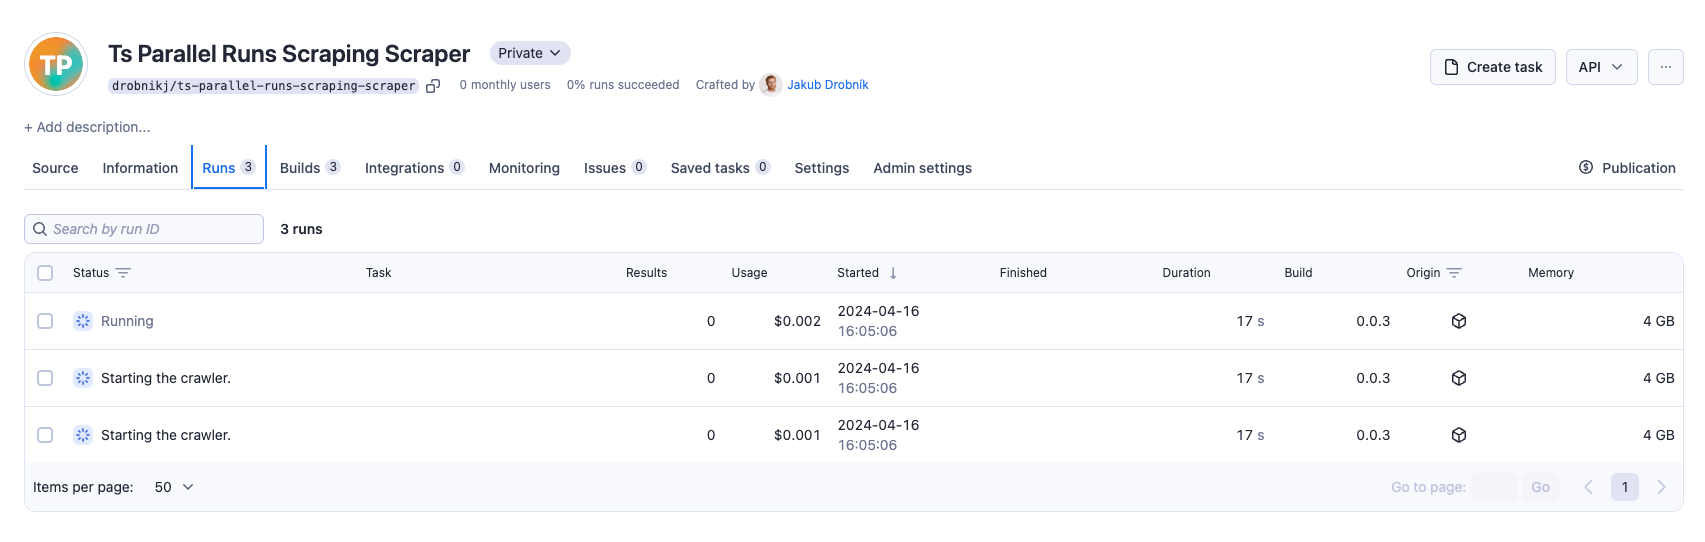
After starting the Orchestrator Actor, you will see the parallel runs initiated in the Apify Console.
Summary
In this tutorial, you learned how to run multiple instances of an Actor to scrape a website faster. You created an Orchestrator Actor to manage the parallel execution of the Scraper Actor runs. The Orchestrator Actor initialized the Scraper Actor runs and managed their state. The Scraper Actor utilized the request queue and dataset provided by the Orchestrator Actor to scrape the website. You could speed up the scraping process by running multiple instances of the Scraper Actor in parallel.
The code in this tutorial is for learning purposes and does not cover all specific edge cases. You can modify it to suit your exact requirements and use cases.